Overview
The document scanner lets you capture paper documents directly in the app:
- Scan maintenance logbook pages
- Capture work orders and invoices
- Digitize 337 forms and STCs
- Archive parts receipts
Scanned documents can be attached to maintenance entries or stored in the aircraft's document library.
Accessing the Scanner
You can access the document scanner from several places:
From Import Logbook Entries
For scanning and importing existing logbook pages:
- Go to your aircraft's Maintenance logbook
- Tap the Import button
- Select Scan Pages
From a Maintenance Entry
To attach a scanned document to an entry:
- Open or create a maintenance entry
- Expand the Attachments section
- Tap Scan Document
From Aircraft Documents
To add to the aircraft's document library:
- Go to Aircraft Setup
- Tap Documents
- Tap Upload and select Scan
Scanning a Document
Step 1: Position the Document
- Place the document on a flat, well-lit surface
- Position your phone above the document
- The camera view shows a live preview
- A rectangle overlay helps you frame the document
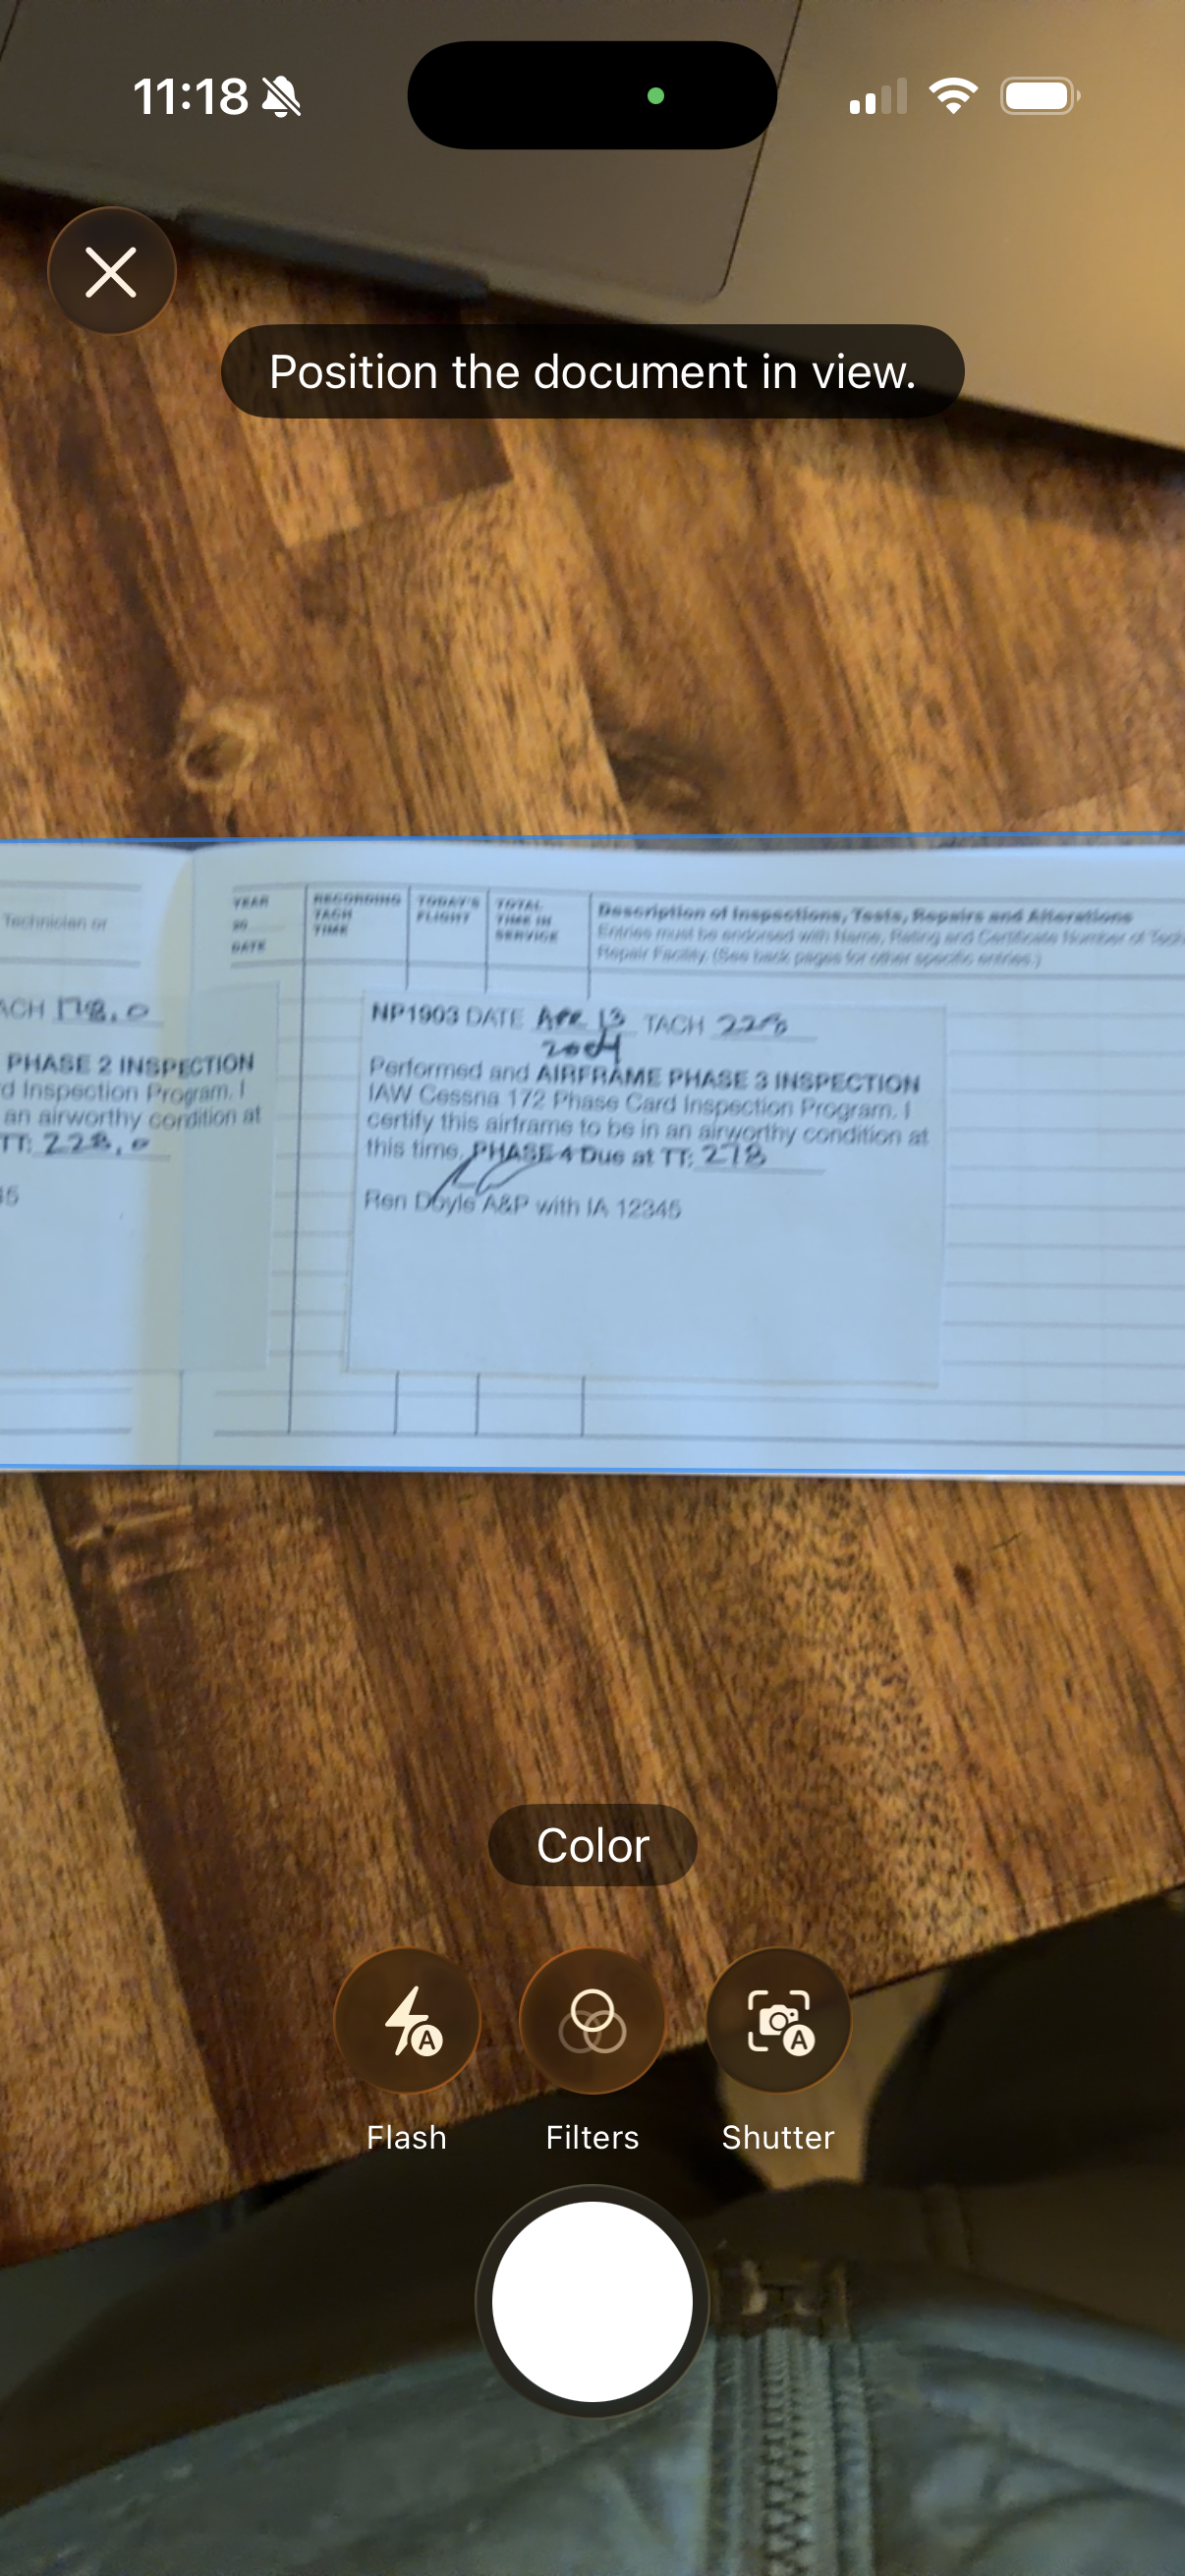
Position the document within the camera view
Step 2: Capture the Image
- Hold your phone steady
- Tap the capture button when ready
- The scanner automatically detects document edges
Step 3: Review and Adjust
After capturing:
- Review the preview image
- Adjust corner points if edge detection wasn't perfect
- Drag corners to match the document edges exactly
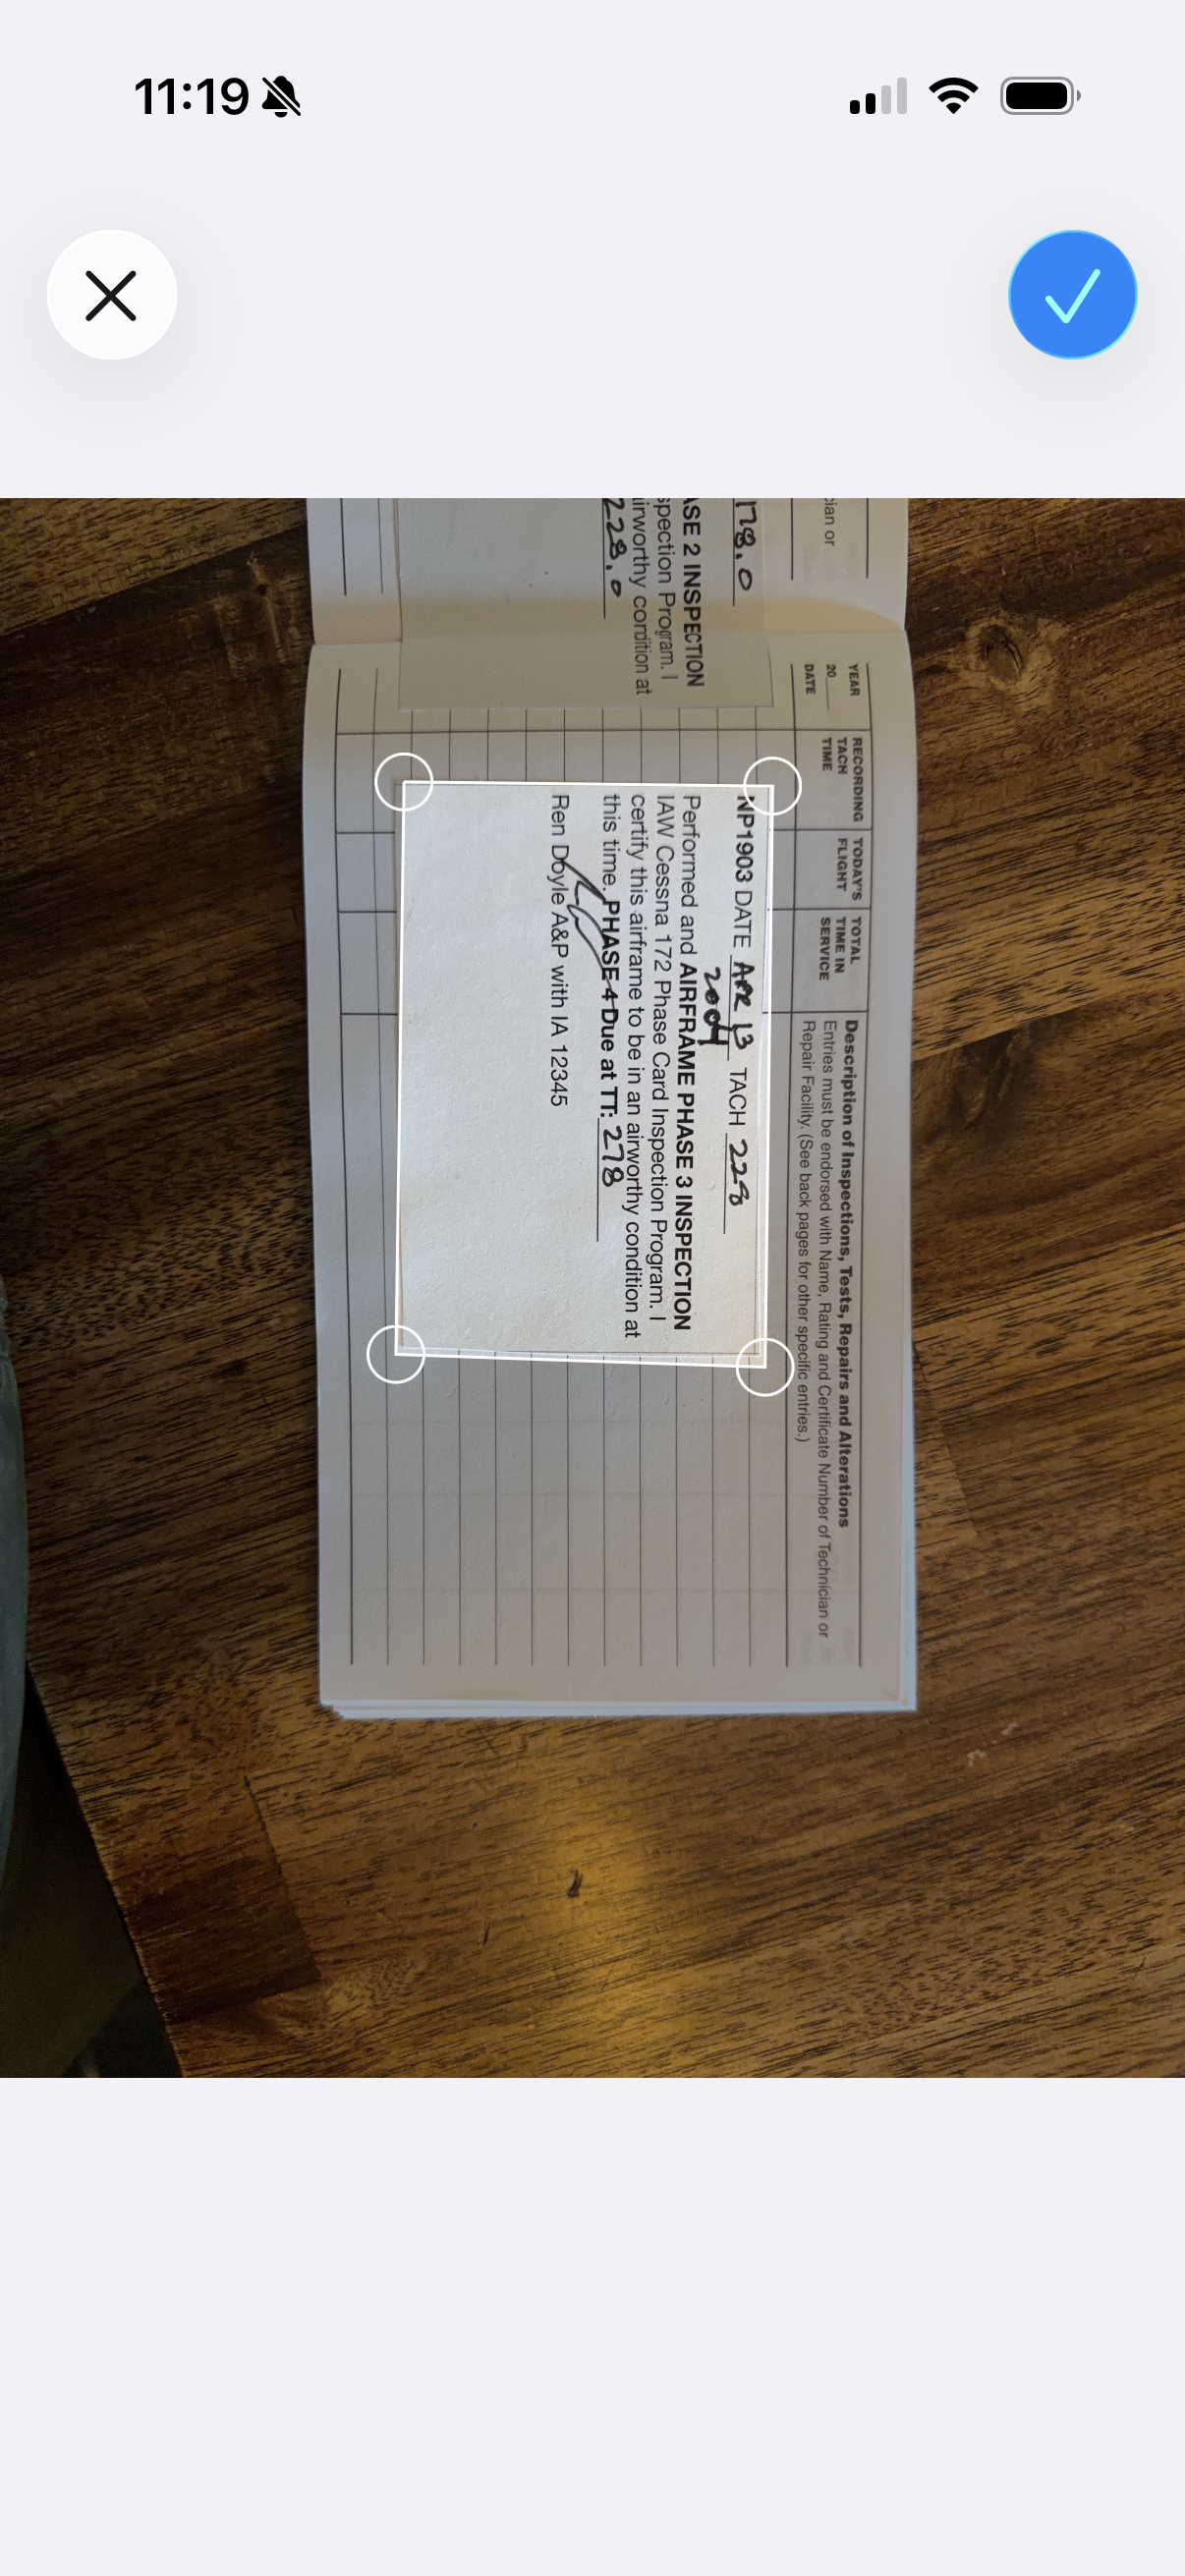
Review and adjust document corners before confirming
Step 4: Confirm the Scan
- Tap Confirm if the scan looks good
- The image is automatically processed (perspective correction, enhancement)
- To scan another page, tap Scan Another
- When done, tap Done or Process
Multi-Page Scanning
To scan multiple pages into a single document:
- Scan the first page
- After confirming, tap Scan Another
- Position and capture the next page
- Repeat for all pages
- Tap Done when finished
All pages will be combined into a single PDF document.
Using OCR Import
For logbook pages, you can use OCR (Optical Character Recognition) to extract text and automatically create maintenance entries. See Use OCR for details.

After scanning, send pages to AI for text extraction
Best Practices
Lighting
- Use even, diffuse lighting
- Avoid harsh shadows or bright spots
- Don't photograph documents under fluorescent lights (can cause banding)
Positioning
- Place documents flat—no curled pages or wrinkles
- Hold phone parallel to the document surface
- Include a small margin around the document edges
- For bound logbooks, press gently to flatten the page
Focus
- Tap on the document to focus before capturing
- Hold still—wait for focus to lock
- Make sure text is sharp before capturing
Organization
- Scan pages in chronological order
- For large logbooks, scan in batches by year or section
- Name documents descriptively (e.g., "Annual 2023", "Engine Logbook p1-50")
Troubleshooting
Blurry scans?
- Hold the phone steady
- Tap to focus before capturing
- Ensure adequate lighting
- Clean your camera lens
Edge detection not working?
- Place document on a contrasting background (white paper on dark surface)
- Ensure good lighting on all edges
- Manually adjust corners after capture
Text hard to read?
- Increase lighting
- Avoid glare on glossy pages
- For faded text, try scanning at an angle to increase contrast